Any Unreal Engine Experts Here?

As the cave seems to be the primary challenge in this project, maybe I should get back to Blender sooner than later. :)

Okay, here's the basic way you should approach cave modeling.

...excuse the crudeness of my example here. I did it in just 20 minutes. Also, pretend it's all in UE.

First, you'll make your little landscape. Use a visibility mask to create a hole in it, like such...


End result, will look something like this:

Screenshot from 2022-02-06 14-07-53.png


Now, throw some rocks into your scene to make a cliff, and the cave entrance around the hole in your landscape...

LMesh2.jpg


...this is just one rock copied over and over again, then scaled and rotated into various places.

That's really all there is to it.

Making the cave itself is even easier. You can start with a regular cube, flip the normals, and begin building tunnels with extrudes and loop cuts. Doctor it up with static meshes.

If you really want everything to fit well together, I believe you can export your landscape mesh out to Blender, providing you a guide to work with.
 
Okay, here's the basic way you should approach cave modeling.

...excuse the crudeness of my example here. I did it in just 20 minutes. Also, pretend it's all in UE.

First, you'll make your little landscape. Use a visibility mask to create a hole in it, like such...


End result, will look something like this:

View attachment 11573

Now, throw some rocks into your scene to make a cliff, and the cave entrance around the hole in your landscape...

View attachment 11575

...this is just one rock copied over and over again, then scaled and rotated into various places.

That's really all there is to it.

Making the cave itself is even easier. You can start with a regular cube, flip the normals, and begin building tunnels with extrudes and loop cuts. Doctor it up with static meshes.

If you really want everything to fit well together, I believe you can export your landscape mesh out to Blender, providing you a guide to work with.

But maybe you read, I don’t want the entrance to the cave to look like piled up bolders, I want a stratified rock face. Which takes me back to Blender and meshes and the question about the cave room made with a hollow cube and the textures on the inside.

However, I understand if you are getting burned out with my questions. No problem if you are, if the situation was reversed, I might be burned out too. :)
 
But maybe you read, I don’t want the entrance to the cave to look like piled up bolders, I want a stratified rock face. Which takes me back to Blender and meshes and the question about the cave room made with a hollow cube and the textures on the inside.

However, I understand if you are getting burned out with my questions. No problem if you are, if the situation was reversed, I might be burned out too.

It's not that I'm getting burnt out, it's that you're like a 1st year engineering student saying you want to learn the bare basics, then ask how to build a rocket capable of achieving orbit.

You really do need to learn those bare basics first. Think of what you want to build in its most basic shapes. Like what are stratified rocks? They're basically just long, thin rectangles stacked on top of each other.

So how would you create a mesh that looks like that? Stack some rectangles on top of each other!

Though that's a little too simple. What if you want to change the shape, make it look more pushed and eroded? You can run some loop cuts through a plane, bevel them so you get a nice little split, inset them, run some other loop cuts across them, then push the verts around to shape it.

Want to go farther than that? You can throw a multires modifier on your model, subdivide it 4-5 times, go into sculpt mode, and bang out some fine details.

Now, how are you gonna make this into a game ready object? Do you know how to bake a mesh to a texture yet? Do you know how to bake down a model?

There's so, so, SO much you have to build upon that starting at the photorealistic end of things will just overwhelm you. In a lot of ways, it's like drawing. You can try try to sketch out a portrait, but if you don't know how to break things down to their basic shapes, it's gonna be a difficult thing for you to do.

Think about what you want to make. Think about the shape. Bang out that basic shape. After that, think about the details. What are their basic shapes? How can you make those? Would it work better as a texture, or a model?

Right now, it's best to think of your project in a piecemeal manner. Make your cliff wall with a cave in it. Low poly. Nothing fancy. Like this...


CaveModel.jpg


Once you get that down, start adding in more details with loop cuts, bevels, and whatnot...

CaveModel2.jpg


Now that you have the bare basics, why not try your hand at subdividing, and sculpt in some details?

CaveModel3.jpg


Learn how to iterate, and iterate, and iterate again. Pick one thing to focus on, then try to get it into Unreal.
 
It's not that I'm getting burnt out, it's that you're like a 1st year engineering student saying you want to learn the bare basics, then ask how to build a rocket capable of achieving orbit.

You really do need to learn those bare basics first. Think of what you want to build in its most basic shapes. Like what are stratified rocks? They're basically just long, thin rectangles stacked on top of each other.

So how would you create a mesh that looks like that? Stack some rectangles on top of each other!

Though that's a little too simple. What if you want to change the shape, make it look more pushed and eroded? You can run some loop cuts through a plane, bevel them so you get a nice little split, inset them, run some other loop cuts across them, then push the verts around to shape it.

Want to go farther than that? You can throw a multires modifier on your model, subdivide it 4-5 times, go into sculpt mode, and bang out some fine details.

Now, how are you gonna make this into a game ready object? Do you know how to bake a mesh to a texture yet? Do you know how to bake down a model?

There's so, so, SO much you have to build upon that starting at the photorealistic end of things will just overwhelm you. In a lot of ways, it's like drawing. You can try try to sketch out a portrait, but if you don't know how to break things down to their basic shapes, it's gonna be a difficult thing for you to do.

Think about what you want to make. Think about the shape. Bang out that basic shape. After that, think about the details. What are their basic shapes? How can you make those? Would it work better as a texture, or a model?

Right now, it's best to think of your project in a piecemeal manner. Make your cliff wall with a cave in it. Low poly. Nothing fancy. Like this...


View attachment 11578

Once you get that down, start adding in more details with loop cuts, bevels, and whatnot...

View attachment 11579

Now that you have the bare basics, why not try your hand at subdividing, and sculpt in some details?

View attachment 11580

Learn how to iterate, and iterate, and iterate again. Pick one thing to focus on, then try to get it into Unreal.
Thanks for the illustrations, I appreciate your efforts, but I did not ask you to build me some models. Now I appreciate that you did, I really do, actually I am thrilled, but that was not my intention, and if my questions strike you as an obligation to put out this kind of effort and it is frustrating you, please stop doing that. I don’t want you frustrated because you are too valuable of a resource to squander.

Last night I spent 4 hours on Blender Day 2 before I read your post because as I am spending the time to picture this project in my head and based on that, and my continuous research in an effort to go from point A to point P I have:
  • identified the basics for what I want as the primary elements of the project.
  • And as I want to visualize, lay these elements out, so they are just not in my head, I am very interested in layout design and want to block out a level, ie create a rough layout in UE that I can walk a character around in to determine scale.
  • And over the last couple of days, I have decided that UE does not offer the best means to build a cave the way I want it built It. That appears to be Blender.
  • And the idea of blocking out the level with Blender low poly modeling is appealing to me as both a learning exercise and as a means of laying out the level.
So I think I got it. :) I am following your advice, but the first Blender tutorial bogged me down. Now I am on the second Blender basics tutorial, and it‘s going well, but due to my learning technique it is slow going because I am alternating writing Huntn’s UE Manual and Blender Manual. These reference controls, tools, UI, rules, tips, and techniques. It is the only way I can expose myself to so much info and later go back and find it again.

I’ll assure you, there is no crisis of faith, but the key here is to keep me motivated and engaged. I am not just totally focused on Step B, Blender modeling, because I am keeping myself engaged with the entire project at least planning what my next step is and verifying that my plan is realistic and doable. Step C is basic level layout, and as I have identified it, Step D is determing how to construct the core of the project the relationship of the cave, to a cliff, to a pool, to a waterfall, how those elements should best be constructed, where and when UE vs Blender should be relied upon and the best way to integrate them.

Btw, Step A which was a huge first step, which was really like 500 steps, was convincing myself that I could recreated the Forest Road which I did (well enough) in UE. Now I got though that, popped out on the other end, still eager to go, so there should be no worry on your part about me getting in over my head and stomping off.

That said, there are no guarantees, if the appeal wanes, yeah I could quit, but I am not feeling that after Step A or now, I’m still feeling excitement to move ahead. And when I get bogged down with Blender tutorials, I might look at the other steps of the project to keep me excited. Lately level layout is something that I see looming over me, and I don’t just want to wing it on the fly, but want to have a methodical way to approach it, which also seems to be through Blender or even using UE low poly shapes. Then there is that cliff and cave. :D
 
Last edited:
Thanks for the illustrations, I appreciate your efforts, but I did not ask you to build me some models. Now I appreciate that you did, I really do, actually I am thrilled, but that was not my intention, and if my questions strike you as an obligation to put out this kind of effort and it is frustrating you, please stop doing that. I don’t want you frustrated because you are too valuable of a resource to squander.

Well, I do think you worry too much. :P

If I sound like I'm being short, it's just because I'm trying to bang out as much I can, while also trying to get you to narrow your focus. You're trying to learn everything all at once, while I think you should be taking baby step by baby step.

Yeah, it's not as exciting to do things that way, but it's a lot more manageable.

Like you want to learn level layout, but you have yet to gain the skills to create things to layout within your levels. You want to make your cave, but you're still rough on mesh modeling, and don't know how to UV unwrap, or bake yet. You need to start small, and work up. Not start big, and jump haphazardly between points of interest.

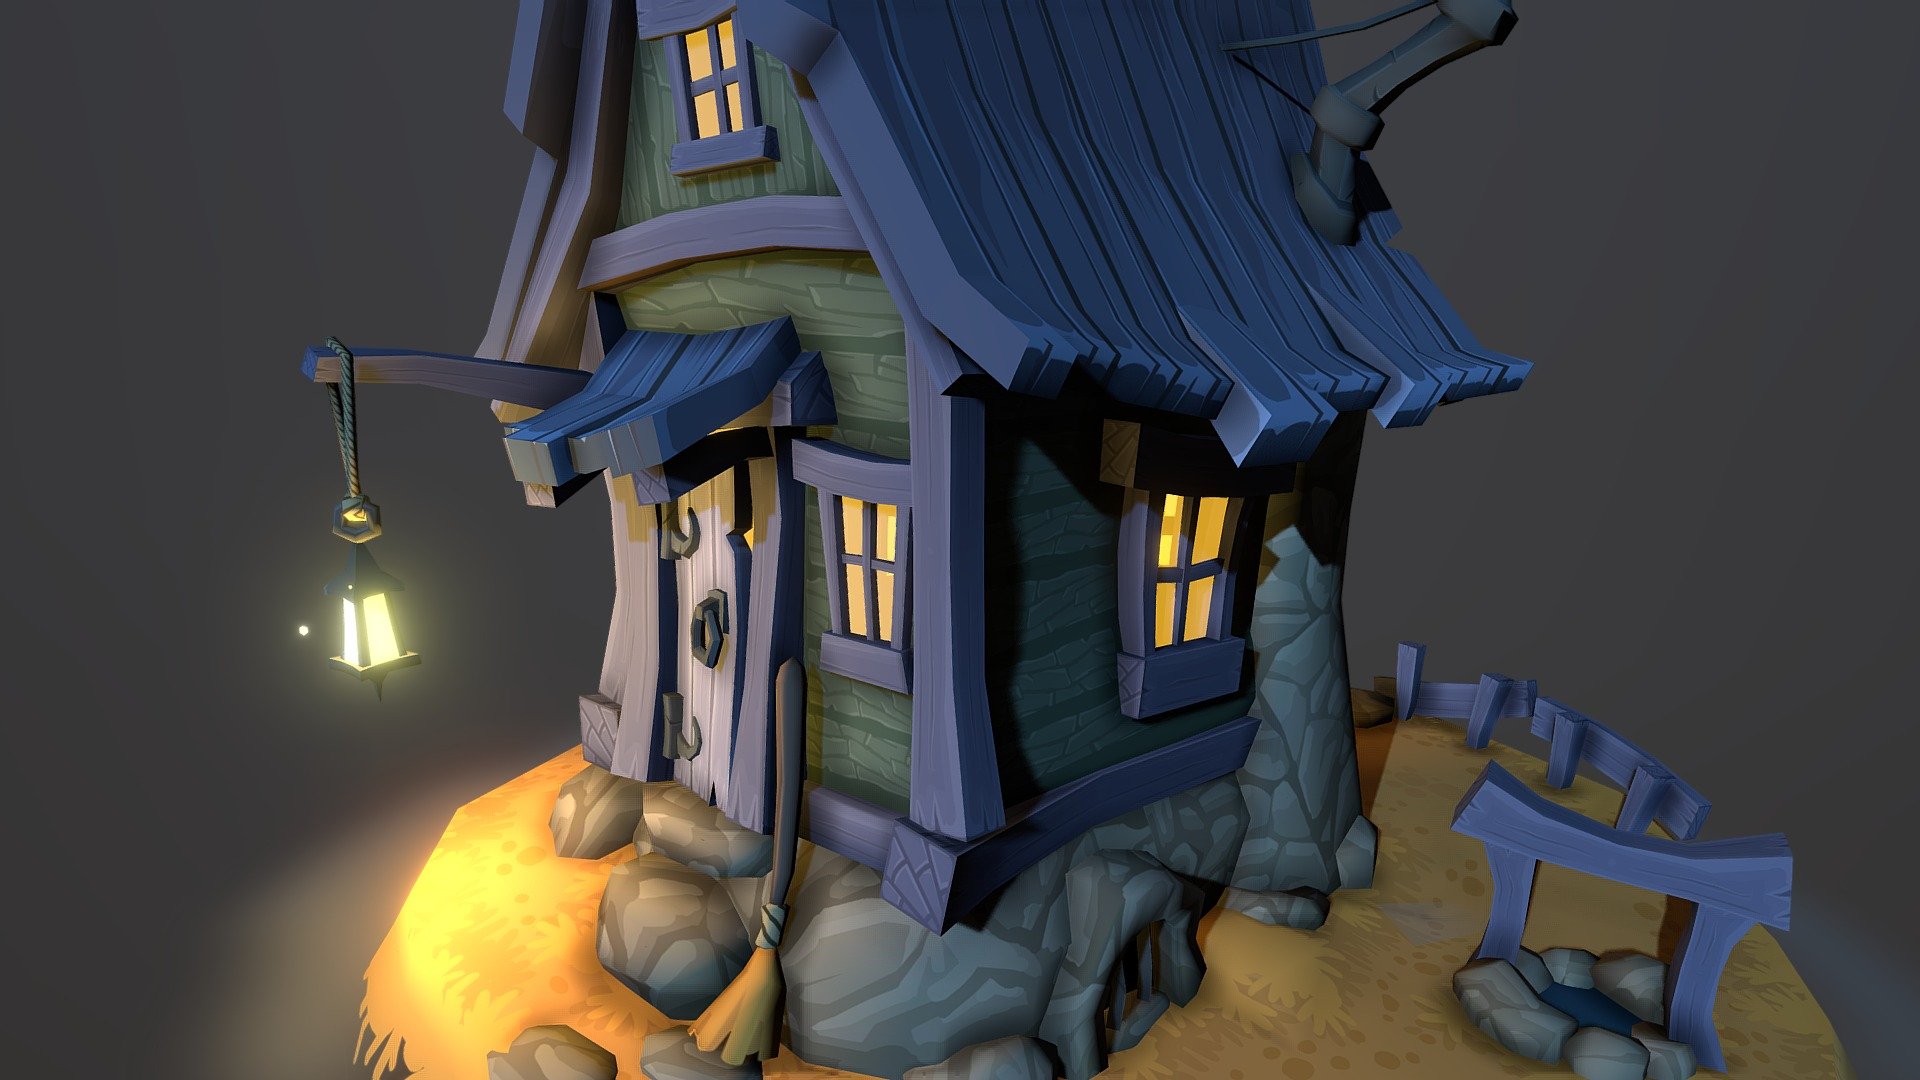
So yeah, focusing on the cliff and cave is a good starting point. Instead of an expansive environment, try to make it into a little diorama. Something like this.

 
Well, I do think you worry too much. :p

If I sound like I'm being short, it's just because I'm trying to bang out as much I can, while also trying to get you to narrow your focus. You're trying to learn everything all at once, while I think you should be taking baby step by baby step.

Yeah, it's not as exciting to do things that way, but it's a lot more manageable.

Like you want to learn level layout, but you have yet to gain the skills to create things to layout within your levels. You want to make your cave, but you're still rough on mesh modeling, and don't know how to UV unwrap, or bake yet. You need to start small, and work up. Not start big, and jump haphazardly between points of interest.

So yeah, focusing on the cliff and cave is a good starting point. Instead of an expansive environment, try to make it into a little diorama. Something like this.

If you are really busy, then just ignore me when it’s inconvenient. I’m ok with that. :)

I appreciate your attention but will politely disagree. I am not haphazardly jumping around and I’m not overwhelmed. The thing is that I see a path. The most cool thing about UE is that it gives you a game environment right off the bat. Regarding level design it’s like the foundation of the house you want to build. Just cranking up UE, you have a room and a little guy who can run around in it and you can fill it full of assets rght away if you want to, but I won’t until I know enough to proceed.

I don’t want to take each step in a vacuum, I want to be sure that what I am proposing is realistic and doable hence my cave questions. And I am not ignoring basic modeling as you strongly suggested. :) In fact I may end up constructing the core of that area (cliff, pool, cave, etc) using low poly models before I do much with big picture layout.

However it’s possible I am going to reach a threshold in modeling, where the next step is the foundation of the project, the level and it’s layout and I can explore this too without getting overwhelmed.

So I’ll post stuff about what I am doing, and don’t think I‘m expecting you spend a lot of time entertaining or educating me unless you have the time to, or more impotently, want to, Btw, that cave modeling you did was impressive to me. :D
 
@Renzatic here is a simple (I think) question when it's convenient. :)

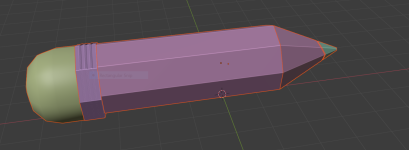
Working on a Blender tutorial (Blender Day 2) and I'm making a pencil. It's an 8 sided octagonal cylinder that I put a couple of loop cuts in. Made one end pointy, made the other rounded. So there are 4 sections because of the loop cuts in this cylinder. I put it into wire frame, then select the faces of one of the basic cylinder sections that I want to duplicate.

The idea is that after I duplicate those faces I'll enlarge the duplication a little and then slide it down the shaft, so it looks like a band on the pencil, but what I am finding is that after I duplicate this section instead of freely moving up the shaft, when I try to move it, it drags the vertices in the rest of the pencil distorting the whole thing.

I've done this before making the road mesh in Blender, and there when I accidentally made duplicates they moved without issue away from the original mesh. but those were duplicates for the entire mesh.

Here I'm just duplicating just a section of a mesh, and it wants to stay connected to the original mesh, instead of sliding freely. The author of the tutorial has not said anything about it, so I'm wondering if there is a setting in Blender that determines whether a duplicate piece of a mesh stays connected to the original or allows it to move away freely?

I just noticed that If I duplicate this section and pull it completely off of the original mesh it is free, but this is not what the author is having to do, he duplicates it, he right clicks to cancel, so it is still super imposed, and then he scales it and slides it without issue. There must be a setting... or :unsure:

Pencil.PNG
It's just a learning exercise. :P
 
Last edited:
Here I'm just duplicating just a section of a mesh, and it wants to stay connected to the original mesh, instead of sliding freely. The author of the tutorial has not said anything about it, so I'm wondering if there is a setting in Blender that determines whether a duplicate piece of a mesh stays connected to the original or allows it to move away freely?

I just noticed that If I duplicate this section and pull it completely off of the original mesh it is free, but this is not what the author is having to do, he duplicates it, he right clicks to cancel, so it is still super imposed, and then he scales it and slides it without issue. There must be a setting... or :unsure:

It's not a setting or anything, but you might be dropping your duplicated section before you scale it, which makes it difficult to grab from the underlying mesh.

The way I'd do something like that would be to add my loop cut, select it, bevel it out so that I have a nice little band, select it, hit Shift-D to duplicate it, scale it out so that it's floating just above the pencil, dissolve the edges I duplicated my band from, then select the outer edge loops, and extrude it in so that it has some thickness.

This is one of those things that's easier shown than described. Gimme a second, and I'll make a video.

edit: here you go...

 
It's not a setting or anything, but you might be dropping your duplicated section before you scale it, which makes it difficult to grab from the underlying mesh.

The way I'd do something like that would be to add my loop cut, select it, bevel it out so that I have a nice little band, select it, hit Shift-D to duplicate it, scale it out so that it's floating just above the pencil, dissolve the edges I duplicated my band from, then select the outer edge loops, and extrude it in so that it has some thickness.

This is one of those things that's easier shown than described. Gimme a second, and I'll make a video.
Thanks. He showed that exactly
  • Select the faces that make up the loop cut section in wire frame to get all of them.
  • Shift D to duplicate, then Right Click to cancel, and with it still selected, scale it up.
Except when I scale it up the pencil distorts because it‘s (what I just created) still connected to the pencil. If if do this step Shift D and then immediately slide it off the pencil, then it is separate. :unsure:

You might be taking one step too many. Once my loop was selected, I hit Shift-D, then S immediately after, and just scaled it up.
 
You might be taking one step too many. Once my loop was selected, I hit Shift-D, then S immediately after, and just scaled it up.
I’ll try that, Thanks! ! He specifically said select faces, Shift D, then Right Click to cancel, then Scale.

in your video, you look like you add the loop cuts, then duplicate,, then scaling. In my example I was selecting a selection that already existed as part of a larger mesh. :unsure:
 
I’ll try that, Thanks! ! He specifically said select faces, Shift D, then Right Click to cancel, then Scale.

Doing that prevents you from accidentally moving your duplicated selection, but it's not something you HAVE to do. The important thing is you don't drop your selection.

...out of curiosity, you haven't defaulted to right-click select, have you?

in your video, you look like you add the loop cuts, then duplicate,, then scaling. In my example I was selecting a selection that already existed as part of a larger mesh. :unsure:

There are multiple ways you can get that loop on your pencil. You don't even have to duplicate your faces to separate it. Making the loop cut, then using an Extrude Along Normals, or Inset to do the same thing, then separate that. Alternately, you could add in another 8 sided cylinder while in Edit Mode, and move/scale it into position.

Once you understand all the various ways you can do things, you can determine which is most efficient and/or convenient for you and your workflow.
 
Just modeled a shoe in Blender starting with a cube, interesting, eyes being opened up. :oops:

@Renzatic I realize you don’t work with UE, but I wondering when I start modeling in Blender for the intent of importing into UE should I even worry about textures while in blender? I assume the Blender system is different, do you know if it handles materials completely different? I assume so.

Does it have materials? If my final product is heading into UE that handles all of the textures, materials, appearance etc, just wondering if there is any advantage to learning materials in blender?

As part of my UE project, I’ll be building a horse stable in Blender and want something unique looking that I design. There maybe some unfinished logs in the construction (maybe not, just exploratory) so I’m going to be looking at tutorials on making tree trunks Blender.

Yes, I’m still working the Blender Day 2 tutorial. The next step in Blender Day 2 is build a coffee cup.

Also I purchased that low poly UE pack for the woods/mountains you linked to. I’ll probably take a look at those trees just to see, but I’m wondering if you can import a mesh from UE to Blender with the intent of manipulating it. I wonder what shape it would show up in Blender. Anyway, not asking you to research anything in particular for me, just blabbing. :D
 
Last edited:
I realize you don’t work with UE, but I wondering when I start modeling in Blender for the intent of importing into UE should I even worry about textures while in blender? I assume the Blender system is different, do you know if it handles materials completely different? I assume so.

It depends on what you're doing. If you're going with wholly procedural materials that don't require UV mapping, then yeah, model in Blender, then make the material in Unreal. If you're going to be working with image based texture maps, then yeah, you're going to want to do all your texturing in Blender, making sure everything looks good before sending it out to Unreal.

Unreal and Blender are both the same in that they both follow a PBR based workflow for their materials. The end node in Unreal, with the sockets for Diffuse, Metallic, Roughness, and whatnot is functionally about the same as Blender's Principled BSDF shader. For example, say you're in Blender, and you have a texture map for your diffuse, normal, and roughness, but you use the slider to put the metallic input up to 0.5. You can do the same thing in Unreal, plugging a texture map node into the Base Color, Roughness, and Normal inputs, then slapping a value node set to 0.5 to the Metallic.

It's when you get into procedurals that things start changing on you. They're still roughly the same. All you're doing is using math to make shapes when you get right down to it. But you'll have various different helper nodes that make getting from Point A to B a slightly different affair.

Also I purchased that low poly UE pack for the woods/mountains you linked to. I’ll probably take a look at those trees just to see, but I’m wondering if you can import a mesh from UE to Blender with the intent of manipulating it. I wonder what shape it would show up in UE. Anyway, not asking you to research anything in particular for me, just blabbing.

You usually can, yeah. Though some asset packs can prevent you from doing so, depending on the whims of the creators. The only way to find out whether you can or not is just to try it.
 
It depends on what you're doing. If you're going with wholly procedural materials that don't require UV mapping, then yeah, model in Blender, then make the material in Unreal. If you're going to be working with image based texture maps, then yeah, you're going to want to do all your texturing in Blender, making sure everything looks good before sending it out to Unreal.

Unreal and Blender are both the same in that they both follow a PBR based workflow for their materials. The end node in Unreal, with the sockets for Diffuse, Metallic, Roughness, and whatnot is functionally about the same as Blender's Principled BSDF shader. For example, say you're in Blender, and you have a texture map for your diffuse, normal, and roughness, but you use the slider to put the metallic input up to 0.5. You can do the same thing in Unreal, plugging a texture map node into the Base Color, Roughness, and Normal inputs, then slapping a value node set to 0.5 to the Metallic.

It's when you get into procedurals that things start changing on you. They're still roughly the same. All you're doing is using math to make shapes when you get right down to it. But you'll have various different helper nodes that make getting from Point A to B a slightly different affair.


You usually can, yeah. Though some asset packs can prevent you from doing so, depending on the whims of the creators. The only way to find out whether you can or not is just to try it.
I’ll look up procedural materials and UV mapping. I’ve looked up “UV” before, but it easily slips away when I’ve not expressly worked with it Nor know how it is specifically utilized.
 
I’ll look up procedural materials and UV mapping. I’ve looked up “UV” before, but it easily slips away when I’ve not expressly worked with it Nor know how it is specifically utilized.

So you've made your model, and now you want to put pretty pictures on it. To do so, you have to cut out your various surfaces, flatten them out, then arrange them on a square 2D space.

That's UV mapping in a nutshell. U and V are really just extra coordinates, basically X and Y, that are reserved for 2D surface maps of your objects. It's really not that complicated, though almost everyone stumbles about on it at first because it's just kinda weird.
I assume UE does this automatically? Blender too?
edit: I take that back. All the textures I’ve used have been made somewhere, someplace like megascans and I have brought them into UE.
 
Last edited:
I assume UE does this automatically? Blender too?
edit: I take that back. All the textures I’ve used have been made somewhere, someplace like megascans and I have brought them into UE.

Yeah, all the Megascanned objects are already UV mapped. You don't have to UV unwrap any geometry generated inside of UE, like the landscapes since it's all fairly simple, and projection mapped.

UV mapping by itself isn't something that's done on the fly, though there are ways to make things simpler for you. Like Smart UV Project will automatically split the faces of your model up according to angle, with the highest settings breaking up your UV map into individual faces. This works fairly well for simple models that you're going to paint inside of Blender, but is sloppy and inefficient, as you'll see when you start doing fancier things like baking edge maps, and normals.

Really, the best thing to do is to learn how to UV the long, old fashioned way.

 
I watched some of that video, and realized it might be a little too advanced for you. You need something more foundational. Like this...

 
Back
Top