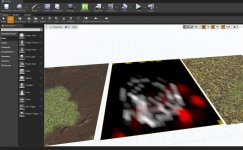
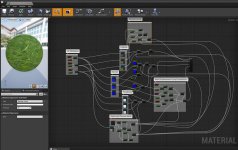
Any Unreal Engine Experts Here?

I also noticed that the original piece is rotated out of it’s orientation during this process. Is there a way to keep the backside of the original piece in place as you build this?

There sure is. See, by default, the bend modifier will try to bend it from the origin point of your object, which is usually in the middle. You'll get the shape you want, but as you can see, it rotates the entire mesh except for the very center. So how do you make it so that it bends away from a starting point?

You give the modifier a reference to bend from. To do that, you use an Empty.

An Empty is pretty much a null object. It doesn't do anything itself. It's just a Blender specific marker placed in your scene that won't render, or export in any way. What it does is act as a reference point for other things in your scene. This could be a point to pivot around for a radial array, an effector for geometry nodes, or, in your case, a way to mark a starting point for a bend.

While in Object Mode, Ctrl-A to bring up your Add menu, and go down to the Empty menu. Choose any one of them that you want. I usually choose the unmarked axis, because the center point of it lets you see at a glance where the center of the empty, the origin point, actually is.

Move it to the beginning of your road. In your Simple Deform modifier box, you'll see a space labeled Origin. Hit it, and select your Empty. Now, when you bend your road, it's always going to bend from that point on to the end. If you're feeling brave, you can move the origin around to see how it twists and bends your road.

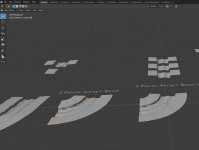
BendEmpty.jpg
 
There sure is. See, by default, the bend modifier will try to bend it from the origin point of your object, which is usually in the middle. You'll get the shape you want, but as you can see, it rotates the entire mesh except for the very center. So how do you make it so that it bends away from a starting point?

You give the modifier a reference to bend from. To do that, you use an Empty.

An Empty is pretty much a null object. It doesn't do anything itself. It's just a Blender specific marker placed in your scene that won't render, or export in any way. What it does is act as a reference point for other things in your scene. This could be a point to pivot around for a radial array, an effector for geometry nodes, or, in your case, a way to mark a starting point for a bend.

While in Object Mode, Ctrl-A to bring up your Add menu, and go down to the Empty menu. Choose any one of them that you want. I usually choose the unmarked axis, because the center point of it lets you see at a glance where the center of the empty, the origin point, actually is.

Move it to the beginning of your road. In your Simple Deform modifier box, you'll see a space labeled Origin. Hit it, and select your Empty. Now, when you bend your road, it's always going to bend from that point on to the end. If you're feeling brave, you can move the origin around to see how it twists and bends your road.
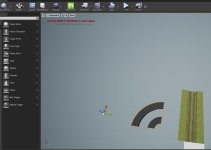
View attachment 9869
How to make it bend right instead of left?
 
Also, I feel the need to remind you that you're getting into some Modeling 202 bits, when you should be doing 101 courses. You're getting into empties, modifiers, deformations, and all that good stuff right out the gate, when most people start out doing, well, this...

LilHouse.jpg
 
-90 to 90. You had the right idea before.
Hmm, that works! But last time I tried it I got something funky, Maybe because last time I typed -90d vs -90? Thanks so much! Now apply modifiers and export with fingers crossed. :D
 
One other question at your leisure, when I’m moving or rotating stuff I see no place to use a number versus eye balling it. I assume there is a way to rotate or move by increment in Blemder?
 
Also, I feel the need to remind you that you're getting into some Modeling 202 bits, when you should be doing 101 courses. You're getting into empties, modifiers, deformations, and all that good stuff right out the gate, when most people start out doing, well, this...

View attachment 9871
Remember my primary focus is to make something happen in UE at this specific place in time. That’s not to play down Bender, it has a big part to play. But instead of doing beginner stuff, I’m learning how to do more advance stuff in Blender to achieve a specific item for use in UE. I think I’m there now.

And I realize that because I latched onto something at a higher level than beginner in UE, that there is a ton of crap to learn. This has been why it has taken me so long to get out of the starter gate with UE. I felt I must get a handle on materials or I’d be setting myself up for frustration. And despite the delay, I am not frustrated. I should be able to get going on the replication of the Forest scene today after I get my chores done around the house. :)
 
One other question at your leisure, when I’m moving or rotating stuff I see no place to use a number versus eye balling it. I assume there is a way to rotate or move by increment in Blemder?

There are a number of ways you can do that. The most straightforward is to activate rotate with the R key, click, and you'll see a little bar open up at the bottom left of the viewport. Expand it, and you'll see options to rotate on angles, axis, and orientations.

Almost every tool has these raw tool options that show up after you commit a command, but it defaults to minimized for some dumb reason.

Also, when you're actively rotating before hitting your left mouse button, you can hit the appropriate rotation axis key, then type in a number on the numpad, like R Z - 4 5 will rotate it negative 45 degrees on the Z axis.

You can also hold down the Ctrl key to lock your rotations to 5 degree increments.
 
Remember my primary focus is to make something happen in UE at this specific place in time. That’s not to play down Bender, it has a big part to play. But instead of doing beginner stuff, I’m learning how to do more advance stuff in Blender to achieve a specific item for use in UE. I think I’m there now.

For what you're doing, you're probably fine. Though generally speaking, you should be treating Blender as your toy workship, and Unreal Engine as the sandbox where you're going to play with the toys you make.
 
This popped up in my Youtube feed today. Figured you'd get a little kick out of it.

 
Had trouble getting that road segment array-bend into UE. It looks fine in Blender, but in UE the middle road section the texture is flipped. I have no idea why. In Blender the road is positive coordinates, so I’ll post in the UE forum and see if someone knows.

I also discovered that tiling out the road pieces after applying texture does not work that well because unless the textures are benignedges stick out. I ended up merging them into one mesh, and then blending on it.

And I’m considering adding some features to my material. One material has 3 textures, the other has 2 but it has noise and other stuff. I’ll see if I can add some of those features to the 3 texture material or, add another texture to the first one.
 
Last edited:
Had trouble getting that road segment array-bend into UE. It looks fine in Blender, but in UE the middle road section the texture is flipped. I have no idea why. In Blender the road is positive coordinates, so I’ll post in the UE forum and see if someone knows.

You might still have some normals flipped due to the way it's calculating the spread of the curve. You can fix it by hitting Alt-N, and selecting Recalculate Outside.

It can be confusing, since Blender automatically defaults to rendering faces two-sided, while UE sticks to one-sided unless told otherwise, so to check it, you can go to your Overlays menu, and select Face Orientation. If your model is all blue, then all the faces are oriented outside, but from the way you're explaining things, I'm expecting it to be a bunch of blues and reds.

Menu.jpg


I also discovered that tiling out the road pieces after applying texture does not work that well because unless the textures are benignedges stick out. I ended up merging them into one mesh, and then blending on it.

You just have to make sure it tiles when splatting your colors around. Any change you make to the edge of one tile should be reflected on the other. Considering both Unreal and Blender only let you paint one tile at a time, it can be a little stodgy to do, but not too difficult.

And I’m considering adding some features to my material. One material has 3 textures, the other has 2 but it has noise and other stuff. I’ll see if I can add some of those features to the 3 texture material or, add another texture to the first one.

Do it! EXPERIMENTATION IS KEY! Screw around, see how stuff works! That's how you learn the most!
 
You might still have some normals flipped due to the way it's calculating the spread of the curve. You can fix it by hitting Alt-N, and selecting Recalculate Outside.

It can be confusing, since Blender automatically defaults to rendering faces two-sided, while UE sticks to one-sided unless told otherwise, so to check it, you can go to your Overlays menu, and select Face Orientation. If your model is all blue, then all the faces are oriented outside, but from the way you're explaining things, I'm expecting it to be a bunch of blues and reds.

View attachment 9903


You just have to make sure it tiles when splatting your colors around. Any change you make to the edge of one tile should be reflected on the other. Considering both Unreal and Blender only let you paint one tile at a time, it can be a little stodgy to do, but not too difficult.


Do it! EXPERIMENTATION IS KEY! Screw around, see how stuff works! That's how you learn the most!
In the process of making the wedge with the road segment, at what point do I select (the road piece, the wedge) and do the Alt-N, recalculate outsides?

Regarding experimenting with materials, I took my somewhat fancy (2texture) material I got from a vertex painting tutorial and inserted a third texture, making some guesses along the way about how the extra plumbing would work. However when i paint with it, the colors are blocky, filling in little rectangles and geometric shapes, not naturally diffuse like I am used to seeing. I remember something about this in one of the many tutorials I watched, but I can’t remember what they said about fixing it, removing the blockyness.
 
In the process of making the wedge with the road segment, at what point do I select (the road piece, the wedge) and do the Alt-N, recalculate outsides?

I'd say after you apply the modifiers, since you're then working with real geometry. Though for a test, I went and created a little road strip to see if it was doing anything weird with the normals, and it's all orienting the faces as I'd expect.

A screenshot of your mesh and curve would help me out here.

Regarding experimenting with materials, I took my somewhat fancy (2texture) material I got from a vertex painting tutorial and inserted a third texture, making some guesses along the way about how the extra plumbing would work. However when i paint with it, the colors are blocky, filling in little rectangles and geometric shapes, not naturally diffuse like I am used to seeing. I remember something about this in one of the many tutorials I watched, but I can’t remember what they said about fixing it, removing the blockyness.

Vertex painting isn't actually painting in a normal sense. It's more like you're marking vertices to output a certain color on the surface of your mesh. Due to such, the resolution of your individual marks is defined by the number of vertices on your face. Or to put in slightly plainer english, giving it more geometry to work with gives you smaller, smoother strokes.

Normally, it isn't something you'll notice too much because it does such a good job of blending all the random shapes and colors of your various textures together, but if you throw in a texture that stands out a little too much, the effect will become apparent.

To give an example, here's a shot of my little road as it looks textured contrasted against it's underlying vertex paints.

RoadTex.jpg


RoadVert.jpg


Notice how the shading spreads away from the individual vertices.

If you want to add more resolution to it, you can apply a simple subdivide by selecting all the faces on your model with the A key, rightclicking, and choosing Subdivide.
 
22D3F49B-05CA-4633-A825-2B1723260F09.jpeg
Wedge in Blender.

E06B05C9-1561-46E2-9B46-DDE713253D21.jpeg
After imported to UE. Center portion flipped. Before creating the wedge, I verified all the coordinates of the original piece were 1.0, not - something.

C990353B-8644-402E-B553-9242E75F00E5.jpeg
Here using the new material is the blocky painting with RGB turned on, it is really blocky compared to the samples next to it Using the original material, not my altered material. No clue why it’s blocky. My guess is I connected something wrong in the material Imaltered, or made a bad assumption.

4719413C-FDB5-4327-B16E-EA2550E27FF5.jpeg
Not that this will help much in any, the culprit material.
 
After imported to UE. Center portion flipped. Before creating the wedge, I verified all the coordinates of the original piece were 1.0, not - something.

It's either a material error, or a normal orientation one. You can see the face when you float underneath it, and are applying the modifiers before bringing them in?

Here using the new material is the blocky painting with RGB turned on, it is really blocky compared to the samples next to it Using the original material, not my altered material. No clue why it’s blocky. My guess is I connected something wrong in the material Imaltered, or made a bad assumption.

Like I said, it's all based upon the underlying geometry. The other materials look fairly similar when you're viewing the raw vertex colors, right?
 
It's either a material error, or a normal orientation one. You can see the face when you float underneath it, and are applying the modifiers before bringing them in?


Like I said, it's all based upon the underlying geometry. The other materials look fairly similar when you're viewing the raw vertex colors, right?
I have not looked in Blemder at the underside of the object because there it looks normal. But I can look at the underside. In Blender should the underside look transparent? I’m not applying any texture there. Yes, I have applied the modifiers in Blender before moving it to UE.

I may have discovered in UE that a texture displacement map input may make the texture fill in less blocky Looking. I’m still experimenting.

I rewatched the Forest scene author paint a single section of road with blended textures and when he tiled the road (duplicated the same piece and butted them together), you can’t see where one ends and the next one starts. This is very interesting because with the single piece if you don’t make the blending exactly the same on both ends, that blending will make the boundary between each new section show the edge because the blending Is slightly different on one end versus the other. Is he that good? :unsure:
 
I have not looked in Blemder at the underside of the object because there it looks normal. But I can look at the underside. In Blender should the underside look transparent? I’m not applying any texture there. Yes, I have applied the modifiers in Blender before moving it to UE.

It'll be two-sided in Blender. I was talking about viewing the mesh inside of UE.

I may have discovered in UE that a texture displacement map input may make the texture fill in less blocky Looking. I’m still experimenting.

From what I gathered, he's using a mask for the mask, so it's painting in more than just the raw vertex colors. I wish I had more to tell you on that front, but I'm still not 100% sure what he did there.

I rewatched the Forest scene author paint a single section of road with blended textures and when he tiled the road (duplicated the same piece and butted them together), you can’t see where one ends and the next one starts. This is very interesting because with the single piece if you don’t make the blending exactly the same on both ends, that blending will make the boundary between each new section show the edge because the blending Is slightly different on one end versus the other. Is he that good?

It's actually fairly easy to do. You just have to be mindful of where you're painting, and make sure that anything you paint on one end is reflected on the other. It also helps that the underlying textures are tiled by default, so you don't have to do that much more to make it look good.
 
It'll be two-sided in Blender. I was talking about viewing the mesh inside of UE.


From what I gathered, he's using a mask for the mask, so it's painting in more than just the raw vertex colors. I wish I had more to tell you on that front, but I'm still not 100% sure what he did there.


It's actually fairly easy to do. You just have to be mindful of where you're painting, and make sure that anything you paint on one end is reflected on the other. It also helps that the underlying textures are tiled by default, so you don't have to do that much more to make it look good.
I've explored textures and materials a whole bunch of late and what I have for the road looks like it could be acceptable. My stupid question for today. In the forest video, he takes some stumps and rock groupings (assemblies?) and places a couple of them along the edge of the road.


Or go to megascans and search on rbBaw for an individual rock asset.

So I'm thinking I'll just go over to megascans and download some stumps and rocks. Well I have some of those, but when I look through them, beside the preview, I'm seeing tons of textures and LODs, but those are textures too.I don't see anything called meshes. Ok so a rock should have a mesh somewhere, I just can't find them. :oops:
And if I'm actually using LOD textures, no clue how to get those inserted into the project. More studying on my part if you can point me in the right direction. :):)
 
Last edited:
I am so reminded of how little I know. :)
I get through the material aspect of UE, get ready to plunk down some actors in my project and realize I just hit another wall. And it turns out the LODs is one thing I ended up skipping in the official UE Intro Tutorial. I think it's because he had made an object in 3DMax, I did not have that, and I did not realize at that point that there was a course project I could download to follow along. I spent the afternoon watching that section, and will attack my project tomorrow.
 
Back
Top