Any Unreal Engine Experts Here?

Yeah, for when you're scattering them in Unreal. For the sake of simplicity, you can just duplicate them inside the same mesh in Blender, then separate them after you're done.
...a couple of days off visiting family. Back now.
Yeah, it was suggested to me in the Unreal Forums to take the group leaf mesh from Quixel/Megascans, import it into a Blender and break it up into smaller pieces. ...just another thing to research. :unsure:

If there is an easy way to describe this, or I can go find a tutorial. Thanks! :)
On second thought I think I've done something like this before...back to my Blender notes. ;)
 
Last edited:
...a couple of days off visiting family. Back now.
Yeah, it was suggested to me in the Unreal Forums to take the group leaf mesh from Quixel/Megascans, import it into a Blender and break it up into smaller pieces. ...just another thing to research. :unsure:

If there is an easy way to describe this, or I can go find a tutorial. Thanks! :)
On second thought I think I've done something like this before...back to my Blender notes. ;)

It's easy. Import the mesh you want to break up, select it, go into Edit Mode with tab, then...

...if it's a mesh with multiple separate parts, then go into edit mode with Tab, select the whole thing by hitting A, hit P to bring up the Separate Menu, and choose "By Loose Part." It'll break the mesh into individual objects, with names like leafmesh.001, leafmesh.002 etc. etc.

...if it's a contiguous mesh, then, while in edit mode, select the faces you want to separate with shift-leftclick, hit P, then choose "Selection." Do this for each leaf you want.

Exporting it from that point on is the standard fare. If you're using Epic's official Send To UE plugin, I believe popping all your leaves into the Mesh collection should export them all as indivudal objects into UE.
 
I saw this pop up in my feed. Might be good for you.


...but don't switch to Rightclick select. He's an oldschool Blender user, and almost everyone has moved on to leftclick these days, me included.
 
Last edited:
It's easy. Import the mesh you want to break up, select it, go into Edit Mode with tab, then...

...if it's a mesh with multiple separate parts, then go into edit mode with Tab, select the whole thing by hitting A, hit P to bring up the Separate Menu, and choose "By Loose Part." It'll break the mesh into individual objects, with names like leafmesh.001, leafmesh.002 etc. etc.

...if it's a contiguous mesh, then, while in edit mode, select the faces you want to separate with shift-leftclick, hit P, then choose "Selection." Do this for each leaf you want.

Exporting it from that point on is the standard fare. If you're using Epic's official Send To UE plugin, I believe popping all your leaves into the Mesh collection should export them all as indivudal objects into UE.
Will report back. Thanks! What I see is a lot of tasks which seem to be easy, but for myself they require research and learning which slows me down to a crawl. Not complaining, and I am not hitting this like a job, so it can be slow progress. At this point, I don’t have to add leaves, but the author did it, so I want to do it too.

With the leaf group, when I apply it as is, because of the uneven ground(?), most of these leaves don’t appear on the surface, which makes me think they are below the surface or they are floating, which makes me want to break them up into smaller groups, so, they place better. I’m not sure but I think the leaves the author is placing are either individual or smaller groups being painted.
 
What I see is a lot of tasks which seem to be easy, but for myself they require research and learning which slows me down to a crawl.

That's pretty much it. Most of the stuff you do isn't nearly as hard as you initially think, but there are about a billion different moving parts you won't immediately account for until you've had some experience with it. It's easy to get overwhelmed when you're starting out.

With the leaf group, when I apply it as is, because of the uneven ground(?), most of these leaves don’t appear on the surface, which makes me think they are below the surface or they are floating, which makes me want to break them up into smaller groups, so, they place better.

Static meshes won't automatically deform to the underlying topology by default. If you have a bunch of leaf models as a single mesh, all aligned on a flat plane, when you go to place it, it's not going to follow the lay of the land. It's going to do a best guess happy medium, aligning that plane primarily where you click, and clipping through and floating on top of all the hills and bumps that make up your landscape.

But if you have your individual leaves as separate objects, all meshes unto themselves, then the engine can scatter them about, flush with the ground, since these meshes aren't constrained to a predefined shape.

If you can't quite wrap your head around it, I can do a quick visual representation that can help you more easily understand.
 
That's pretty much it. Most of the stuff you do isn't nearly as hard as you initially think, but there are about a billion different moving parts you won't immediately account for until you've had some experience with it. It's easy to get overwhelmed when you're starting out.


Static meshes won't automatically deform to the underlying topology by default. If you have a bunch of leaf models as a single mesh, all aligned on a flat plane, when you go to place it, it's not going to follow the lay of the land. It's going to do a best guess happy medium, aligning that plane primarily where you click, and clipping through and floating on top of all the hills and bumps that make up your landscape.

But if you have your individual leaves as separate objects, all meshes unto themselves, then the engine can scatter them about, flush with the ground, since these meshes aren't constrained to a predefined shape.

If you can't quite wrap your head around it, I can do a quick visual representation that can help you more easily understand.
I think I understand. Let’s see how it goes before I whimper for help. ;)
 
Well, I am not whimpering exactly… ;)

...if it's a mesh with multiple separate parts, then go into edit mode with Tab, select the whole thing by hitting A, hit P to bring up the Separate Menu, and choose "By Loose Part." It'll break the mesh into individual objects, with names like leafmesh.001, leafmesh.002 etc. etc.


This worked, I got a list of about 150 files labeled like you said. They were organized as a collection with the 150 individual meshes. I created new collections with smaller groups of these meshes (the original collection stayed intact), and then selected the smaller groups of them (individually all selected) and exported them into single .fbx files. These however, when I imported them into UE gave a fault, no mesh detected, or something like that.

So, I’ll have to keep experimenting.

My question: When I see the list of individual files are they truly separated? Or is there another step to make them seperate entities?
 
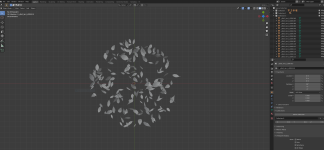
Show me a screenshot of the meshes inside of Blender. I want to see what they look like.
 
BlenderLeafMesh.PNG
 
Let's start slow here. Find 5 of your favorite leaves out of the bunch, delete the rest, then move them all so that they're positioned at 0,0,0 on the grid. Once you've done that, hit Ctrl-A, and select All Transforms for each of your 5 leaves individually.

Also, how does UE generate LODs? Does it automatically create them based off the name of the object? If so, for the sake of making things a little easier, delete the LOD0 at the end of each named leaf, and see what that does.
It may do that. Those are all called LODs cause they came from LOD0, the highest resolution, mesh/collection. . I presume a collection from UE, that Blender treats as a collection, I split up In Blender following your directions, so they all say LOD0.001 to LOD0.150, variation of the original mesh.

What does transform do?
 
What does transform do?

Blender basically has two major modes when it comes to moving your objects about: edit and object mode. This is one of the biggest points of confusion to anyone first learning Blender, because what you do in object mode will effect the way some tools behave in edit mode.

In short, edit mode always assumes your origin point (the little orange dot) for your model sits at 0,0,0 on the grid. Your origin point will be where your objects will move from, scale from, or rotate from. When you move or scale something in object mode, it effects the positioning, rotation, and scaling data on the object itself, while edit mode assumes you're at 0 on transform and rotate, and 1.0/1.0/1.0 on scale.

It also effects how things behave in Unreal, doing much the same thing. If you scale your model in object mode, and don't reset its values, it'll end up either bigger or smaller than you'd expect

Stupid, right? Don't worry. It screws with everyone at first. There's actually a good reason for this confusing setup, which you'll learn about the more you use Blender, but starting out, it's a complete teetotal mindscrew.

What you want to do is, while in edit mode, move your geometry to the center of the grid, orient it, and scale it to taste, then hop back over to object mode, hit Ctrl-A, and apply it's rotation, location, and scale (or hit All Transforms, which does all three). This will reset all your transforms back to their default.

...and will make it so that things will perform more predictably in Unreal.

What about collections, some of these leaves I duplicated them into a new collection. I assume if I want them to act as a group, I need to keep them as a collection which maybe easier than dealing with 5, 10, or 20, or more individual leaves individual leaves.

Obviously I need to study about Collections. I have a link on docs.blender.org about collections yet...

If I create a new collection with pieces from an existing collection are the meshes in the new collection completely free from the original collection, or tied to it somehow?

When I was playing with Collections in Blender, I discovered that if I selected items from a collection and moved them to a newly created collection, they did move and no longer remained in the original collection.

If I Right Click on the Collection icon that looks like a file box, and tell it to "unlink" that collection disappears in the list of collections, but I have yet to figure out where it went. Ideas?
 
Last edited:
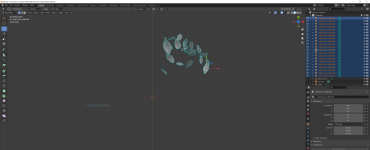
Blender Leaf Mesh2.PNG
In this example I removed all the leaves except one much smaller group and they are still in a collection. When I select all of these leaves or any individual leaf they all show Location XYZ= 0 and rotation XYX= 90,0,0. This is in both edit and object modes.

Ok, so I assme they are all showing zero even though they are clearly not in the center of the grid because they are part of a collection and as far as that collection goes, they are all location 0,0,0.

I don't mind if they act as a group, I'd like them to stay grouped and this is a much smaller group then what i started out with, but I don't see how to get them on the 0,0,0 of the grid, and I recognize that as a group, the group would be 0,0,0 but obviously I don't want all the leaves sitting on top one another at 0,0,0.

I also noticed if I select this group by the collection box, and select unlink they vanish. Where do they go? I would assume I have to unlink them from the collection, move them so they surround the center point, group them into another collection, and then set the group location as 0,.0,0. I don't see how to do that.


Update: I played some more may have gotten it, got 18 leaves to transfer over. I'll apply materials to them tomorrow and see how it looks. Don't ask what I did in blender :p

 
Last edited:
Since you're more concerned with getting things over to Unreal, you only need to worry about collections as ways to organize your work. Like the icons show, they're basically just little boxes to put stuff in. All the fancy stuff you can do with them beyond that isn't much of a concern to you.

Though I did notice you're not using the SendtoUE plugin, so putting things into a collection labeled "mesh" isn't even anything you have to do.

What you need to do is position each individual leaf at the origin point of the grid, and reset it's transforms. Like this:

OriginPoint.jpg


Notice the numbers along the right side of the screen under Transform, how they're all zeroes and 1.0's? That's the way all your models should look before being exported into Unreal. The origin point, that little orange dot that's sitting in the center of the leaf mesh, that's carried over into Unreal. That's an anchor telling both Blender and UE where to orient the mesh in your scene. When you're scattering objects, you're scattering those dots, which the leaf meshes are oriented to.

That's why you always want to put everything in the center of the grid before bringing it into Unreal.
 
Since you're more concerned with getting things over to Unreal, you only need to worry about collections as ways to organize your work. Like the icons show, they're basically just little boxes to put stuff in. All the fancy stuff you can do with them beyond that isn't much of a concern to you.

Though I did notice you're not using the SendtoUE plugin, so putting things into a collection labeled "mesh" isn't even anything you have to do.

What you need to do is position each individual leaf at the origin point of the grid, and reset it's transforms. Like this:

View attachment 10430

Notice the numbers along the right side of the screen under Transform, how they're all zeroes and 1.0's? That's the way all your models should look before being exported into Unreal. The origin point, that little orange dot that's sitting in the center of the leaf mesh, that's carried over into Unreal. That's an anchor telling both Blender and UE where to orient the mesh in your scene. When you're scattering objects, you're scattering those dots, which the leaf meshes are oriented to.

That's why you always want to put everything in the center of the grid before bringing it into Unreal.
My impression is that if it is a collection, that the 0,0,0 is the group center?
 
My impression is that if it is a collection, that the 0,0,0 is the group center?

In this instance, collections are nothing more than a way for you to organize your models on the outliner. They don't make any changes beyond that.
 
In this instance, collections are nothing more than a way for you to organize your models on the outliner. They don't make any changes beyond that.
Yet when I clicked on a very large collection of leaves, choosing individual leaves, they all registered as 0,0,0, although they were clearly in different locations.
 
Back
Top