Any Unreal Engine Experts Here?

I thought you knew about those. Brushes (aka mesh primitives in everything-else) have been around since the Unreal 1 days. It's how they used to build whole levels back in the long ago.
It‘s one of those things that the variety of mostly environmental focused tutorials did not bother with. I had seen some brief talk in an advanced environmental artist tutorial about blocking-in levels but brushes were not demoed but may have been mentioned, but at first exposure, I would not have guessed they were geometric shapes based on the name “brush“.

This UE5 beginner course as just a part, describes them and how to use them, and why they are good for roughing in a level because they are fast. Even textures can be applied to them. In the UE editor in the “place actor” section there is one part categorized as meshes (static meshes- basic shapes, cube, cylinder, cone) and another category called geometry where these brushes can be found (basic shapes- cube, cylinder, cone, stairs, curved stairs).

I need more exposure to them, working with them, and I think this would pop up in one of the architectural layout courses.

Now maybe there is more to come in this course, but what I’m not seeing so far (which might not be covered) is that after a level is laid out using brushes, just how crude does it stay, how complex would an artist try to make and represent, a structure using brushes and later just how hard is it to change them over to meshes of the same size, the exact same size, or are they used just as approximations? Rhetorical.

The author shows how a simple shape like a cube, can be hollowed out, doors and windows placed (cut out) using negative brushes. My question is this just a rough approximation of a layout, or would the intent to replicate the exact sizes of these cubes as the outer perimeter of a more complex structure? Would a complex building be represented as just be a cube, or a combination of cubes, or using the positive and negative qualities of brushes, would complex structures be crafted using brushes. And then how much of that info would be used to model a complex building In the third party modeling program. Answers to be found. :)
 
Last edited:

Hey, Huntn. Guess what?

UE5Linux.jpg
 
Hey, Huntn. Guess what?

View attachment 16011
The complete UE5 beginner’s course at Udemy.com I found to be well worth the $14 I paid for it, clear, precise, efficient, seems to be covering all, not just some of the basics and takes you though creating a basic game. For myself my intent is not a tradional game, but many of these game mechanics seem to be good to know for what I intend on creating.

What is missng and I acknowledge is 3D modeling…which you seem to have a handle on. :)

 
Last edited:
There are two other courses I am considering the price seems right if on sale at abiut $15. If their normal retail price, around $100, I’d be more hesitant. And while I’m not sure, it seems that constant sales seem to be a matter of routine there:


There are two other courses I am considering the price seems right if on sale at abiut $15. If their normal retail price, around $100, I’d be more hesitant. And while I’m not sure, it seems that constant sales seem to be a matter of routine there:

Yup. I've bought a few courses off Udemy before. Unless you're really anxious to get learning, I'd suggest just waiting a week for the price to go down.

Alternately, you can learn quite a bit off free Youtube tutorials, though that does come with the assumption that you already know what you're looking for.

What is missng and I acknowledge is 3D modeling…

The best way to learn is to start!

Though if you have a good iPhone, you could consider photogrammetry. Apple has built in apps for just that these days, and since you're using UE5 now, you can just enable them as nanite objects, and not worry about the polycount.
 
Last edited:
Yup. I've bought a few courses off Udemy before. Unless you're really anxious to get learning, I'd suggest just waiting a week for the price to go down.

Alternately, you can learn quite a bit off free Youtube tutorials, though that does come with the assumption that you already know what you're looking for.


The best way to learn is to start!

Though if you have a good iPhone, you could consider photogrammetry. Apple has built in apps for just that these days, and since you're using UE5 now, you can just enable them as nanite objects, and not worry about the polycount.
The courses I have purchased are marked down substantially less than $15 each. I’ve not heard the term, nanite objects. Are these meshes?
 
I’ve not heard the term, nanite objects. Are these meshes?

It and Lumen are the two biggest new features of UE5. To explain it as simply as possible, you don't have to worry about poly counts and LODs with Nanite. You just make a mesh, and toss it in. The engine will cull it down automatically.

It does have some limitations, but it's still pretty damn incredible.


Holy crap! I knew there were reasons to be in UE5. I did know about Lumen. :)
 
I’m not sure but I think that Niagara (maybe new) and water system has been updated In UE5.

I’m still trying to get an adequate handle on materials. One of the problem with the Epic courses, is that they are not complete, especially the part about channel packing. The author shows images of rock textures and how he needs two of them to blend the textures on rock surfaces (I get and see that) but then the actual textures in the project download, look different than what the course shows. He says he made the textures in Quixel Mixer, but does not show that, nore is there a course on that, although I suppose I might find a tutorial on that.

The advanced course maybe over kill as in I could probably use a simpler example of a landscape layer blending material that includes displacement. I actually need to play with the material that came with the course and see how it functions (if it functions) and make sure I understand to use its settings.

And then there is vertex painting vs landscape layering, both feature displacement but no one has said why one is better than the other, other than a landscape lmaterial is better for large landscapes, but I’m not sure why it’s better. . A landscape material might have 6 textures, but I see no reason why a vertex painting material could not have 6 textures too.

I’m just talking, not expecting answers from you. :) I’ll post this last part in the Epic forums.
 
I’m still trying to get an adequate handle on materials. One of the problem with the Epic courses, is that they are not complete, especially the part about channel packing. The author shows images of rock textures and how he needs two of them to blend the textures on rock surfaces (I get and see that) but then the actual textures in the project download, look different than what the course shows. He says he made the textures in Quixel Mixer, but does not show that, nore is there a course on that, although I suppose I might find a tutorial on that.

Channel packing isn't really that difficult. All you're doing putting three separate greyscale images into their own specific RGB channels, which themselves are separate greyscale images that produce color when combined together. It's something you could do in any halfway decent photo editor (even GIMP can do it, which I consider only halfway decent). The only thing you need to be mindful of is which map you're putting in which channel, and to keep it consistent across all your textures for the sake of your own sanity.

Once you do it, the only thing you need to do is to run your image through the UE equivalent of a Separate RGB node, then run each channel to their appropriate slots on the output node.

Though keep in mind that channel packing isn't something you absolutely HAVE to do. It's a simplifying/space saving feature primarily. Your project probably won't be so large that channel packing becomes an outright requirement.

And then there is vertex painting vs landscape layering, both feature displacement but no one has said why one is better than the other, other than a landscape lmaterial is better for large landscapes, but I’m not sure why it’s better. . A landscape material might have 6 textures, but I see no reason why a vertex painting material could not have 6 textures too.

I'm not exactly sure what landscape painting is in UE, but I'm assuming it's probably image mask based. The problem with vertex painting is that it can be hard to bang out really tiny details if your underlying mesh isn't a high enough resolution to paint them in. Vertex painting, per it's name, shades from each vertex point outwards, while an image mask is only limited by the resolution of the image itself.

My only question is how they're getting 6 textures in there. The most I could think you could get out of a mask would be 5, for the black default, the textures assigned to the R, G, and B, channels, and maybe an alpha with some finagling.
 
Channel packing isn't really that difficult. All you're doing putting three separate greyscale images into their own specific RGB channels, which themselves are separate greyscale images that produce color when combined together. It's something you could do in any halfway decent photo editor (even GIMP can do it, which I consider only halfway decent). The only thing you need to be mindful of is which map you're putting in which channel, and to keep it consistent across all your textures for the sake of your own sanity.

Once you do it, the only thing you need to do is to run your image through the UE equivalent of a Separate RGB node, then run each channel to their appropriate slots on the output node.

Though keep in mind that channel packing isn't something you absolutely HAVE to do. It's a simplifying/space saving feature primarily. Your project probably won't be so large that channel packing becomes an outright requirement.


I'm not exactly sure what landscape painting is in UE, but I'm assuming it's probably image mask based. The problem with vertex painting is that it can be hard to bang out really tiny details if your underlying mesh isn't a high enough resolution to paint them in. Vertex painting, per it's name, shades from each vertex point outwards, while an image mask is only limited by the resolution of the image itself.

My only question is how they're getting 6 textures in there. The most I could think you could get out of a mask would be 5, for the black default, the textures assigned to the R, G, and B, channels, and maybe an alpha with some finagling.
It has to do with saving VRAM, and if I remember correctly there is or was some hard limit under UE4. I’m not sure about UE5. I think it is textures nodes (samplers) that are memory hungry, so if you fit roughness, metallic, and AO into one texture sampler you just save 2 or 3 extra texture nodes for each texture you use. As you know some textures don’t use metallic, but you are still saving 3 in 1 for each texture. But as far as the hard limit, I’d have to go back and find it in my mountain of notes.


Vertex Paint vs Landsape material- They use different material nodes (ie code) to Vertex paint versus a landscape material built to use what are called layers (layer blending node). During the process of building the material, you add layers to that node by hitting a plus sign, and then you feed each texture into the layer blend node from their individual collection of texture sampler nodes.

In a UE project Tutorial, using a landscape material, there were 6 layers with labels like dirt, pebbles, rock, sand, grass. However I can’t get it to work very well. It was designed for a desert setting and everything look bleached out, although I suppose I could change out the textures, but I’d need to figure out channel packing. I think you are right in that it’s not that hard to do. It just pisses me off when an instructor says I made this texture but does not show you how they made it, I need to find a tutorial on channel packing for UE. :)

So right now in my UE evolution, I‘m trying to nail down if as a matter of routine, should I be using a vertex painting material or a landscape material, or there are situations for each one.? And I need to get my hands on an example of the appropriate material for this project I’ve started. I have a vertex painting material from one of my Epic tutorials. Currently looking for a landscape material.

The first step is to start small with a small outdoor setting and see how it goes. Actually I should probably try the Vertex painting material and then do it with a landscape material. The landscape material works just like vertex painting as far as texture application, pick a texture and start applying it to the terrain.

One thing way back in the Forest Road project I like using the mesh from blender to define the road because you could make small adjustments easily by grabbing vertexes and moving/manipulating them around. Where as in UE landscape brushes are, at least they don’t seem to be as precise. Fir creating a large outdoor environment it seems to me that most artists use a third party terrain generator.

And note that the water system in UE as it currently exist requires a UE landscape with layers to be used for the water to work. Yes, you can create the landscape in UE and then import a height map in.
 
Well I just figured out that you can no longer Vertex paint on a landscape in UE5. Or I'm losing my mind, because of the projects I played with, such as the Forest Road, I vertex painted the landscape... I think. Well I know I did not use a landscape layer on it. :oops:

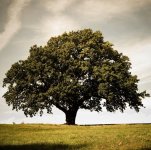
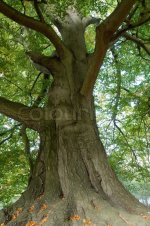
Ok I'm am starting to put together a scene. I have several free tree packs and the one I purchased for $30 a while back. I need to take a close look at that one, but I've decided for this first scene I want a large specimen tree, like the big oak, with large branches all over, not the kind of tree with a very tall trunk, before you see the first limb.

Anyway I was wondering if your Blender tree automater could be set up to create something like, something beyond a generic tree? I wonder how hard it would be to create in blender? No asking you to make me a tree... :)

5e91b0e9f73b58c9fdd86d08df8f19a3.jpg

800px_COLOURBOX1439667-2.jpg
One other question, the the Forest Road project, the guy I was following, he basically said to take any tree mesh and make it as big as you want. Could there be an issue with ending up with leave larger than they should be? Or would the leaves stay the same size? Or would it be the idea that probably no-one would notice?
 
The fun never stops. :D
I'm a little frustrated right now. I purchased a Landscape material pack for $15 from Epic. I thought it would solve the problem of getting some textures for UE Landscape layering. Well the Landscape material is nothing short of amazing, but it does not have all of the textures I want, and all of these textures have one channel packed texture sampling.

So what I'll be doing is going to my original Forest Road project, pluck the 3 textures out of there, but then I have be be sure they are configured properly to be used with the Landscape Material. I've downloaded Quizel Mixer, and I'll find a tutorial on how to use that, and hopefully I'll be able to reconfigure the Forest Road textures so they fit into the Landscape material. :unsure:
 
Hey, I've been overly busy this weekend, but rest assured, I will answer your questions eventually. :P
 
As far as creating Textures from scratch, Quixel Mixer looks like it's designed to create new textures by blending other existing textures. I did not get that far into the tutorial manual before it became evident this is what mixing is. But I was hoping that it would also have the ability to create texture maps like base color, normal, roughness, etc. But instead of continuing this, I posted a question over at Epic.
My impression now is that if you want to create textures from scratch you'd do it in Photoshop or Affinity and put it together there. However my guess is that Megascans has all the variety I'd need for putting together a texture, so I'm going to look at what my landscape material uses, then see if Megascan has the ones I need to use these previously used materials I had from the Forest Road project, and then if it does, I'll get Affinity photo and look for a tutorial on channel packing... :):)
 
After visiting Megascans, I came away with the impression that for the Nanite System, you have to find Nanite enabled textures. :unsure:

So regarding textures, I thought I was going to have to jump into channel packing to get textures I wanted that were compatible with an excellent landscape material I purchased. At my stage of development it was worth the $15 I spent (at the Epic Marketplace). I’ve been doing tutorials learning Material design and there seems to be many ways to skin that cat.

Each texture characteristic, approx 5 of them, The author of this material used channel packing and devoted one texture sample to placing 3 texture maps- roughness, displacement (height), and ambient occlusion into it. These maps are each represented by a gray scale image, so in the name of saving memory, 3 of these can be put in one image on the RGB channels, one per channel. Apparantly it is now the standard.

Material = code in GUI format that relies on nodes, each with a purpose, strung together that creates a finished textures. The thing is texture maps tend to plug into the material in a certain manner, and you don’t want to be adding more texture samples from a project overhead perspective, so there might be a need to learn how to channel pack if you have a texture from another source that did not rely on channel packing And you don’t want to add more bulk to the material by way of more texture samples.

One question I need clarification on, is does the complication/bulk of the material add bloat to the finished project, or is it just the textures applied to the surfaces in a scene that impact how well it runs?

Anyway for the landscape material I purchased, I like the included textures, but needed/wanted different textures for the project I am working on. The author labeled his channel packed texture RHAO- roughness, height, ambient occlusion, so I was exploring tutorials on channel packing thinking this is what I’d have to do when importing a new texture, to conviently use this landscape material.

But then when I went to Megascans to download some textures, I almost panicked when I discovered they had adopted a new format that includes channel packing as a standard. Now, don’t ask me why I panicked, channel packed materials is what I needed. It was just something new in the avalanche of new info to digest. :)

During downloads, I was no longer getting the Roughness, Ambient Occlusion or Height (displacement) maps I expected. The new texture is called ORD. Apparantly this is the channel packed texture standard they have adopted. It is slightly jumbled as to which quality occupies which channel, for example the R Channel always was roughness, but no longer the case and once I found some documentation, it was easy to adjust the landscape material and plug this texture in properly to the associated nodes. So what this means is I don’t have to learn how to channel pack, at least not now. :)
 
After visiting Megascans, I came away with the impression that for the Nanite System, you have to find Nanite enabled textures.

It's not textures, but the meshes themselves. For a Nanite object, you don't need heightmaps or normalmaps. The tiny details are already there on the object itself, so there's no need to fake any of it through the textures. All you need is a diffuse/albedo, roughness, and metallic map to determine surface reflectivity.

Material = code in GUI format that relies on nodes, each with a purpose, strung together that creates a finished textures. The thing is texture maps tend to plug into the material in a certain manner, and you don’t want to be adding more texture samples from a project overhead perspective, so there might be a need to learn how to channel pack if you have a texture from another source that did not rely on channel packing And you don’t want to add more bulk to the material by way of more texture samples.

From what I understand, each node will add x amount of scant miliseconds to process and load, but once they're resident in video memory, they're not adding any extra draw calls or doing much of anything beyond taking up space in RAM.

To put things in perspective, UE5 has support for Substance materials, which are fully procedural, comprised of dozens of nodes that can be changed on the fly. Compared to your basic imaged based texture stack, they're far, FAR more process intensive, yet you can still have a fair share in your scene.

So while you should try to aim for efficiency, don't let yourself be too constrained by it.

Also, I should add that I don't have much experience in game design. I kinda know the song and dance, but that's about it.

But then when I went to Megascans to download some textures, I almost panicked when I discovered they had adopted a new format that includes channel packing as a standard. Now, don’t ask me why I panicked, channel packed materials is what I needed. It was just something new in the avalanche of new info to digest.

Well, it's a pain in the ass having to redo all the textures you've already downloaded, but it's hardly an insurmountable situation. You can channel pack an image, save it out, then reapply it in UE in about a couple of minutes once you get some practice in. It's just tedious.

Okay, now for the rest of your posts. :p
 
As far as creating Textures from scratch, Quixel Mixer looks like it's designed to create new textures by blending other existing textures. I did not get that far into the tutorial manual before it became evident this is what mixing is. But I was hoping that it would also have the ability to create texture maps like base color, normal, roughness, etc.

At it's most basic Mixer, well, mixes. It's allows you to combine multiple megascan assets, or any texture stack you happen to have on hand into something new, but it doesn't have any functionality to create textures from scratch.

If you wanna do that, you'll need to get into something like Substance Designer, which not only allows you to create something from scratch, but also process photogrammetry data. That's another rabbit hole for you to get lost down if you're so inclined.

Mixer can also be used to texture your models, a'la Substance Painter. It's not quite as feature rich in comparison, but it's still pretty good, and also not nearly as obtuse about it.

Anyway I was wondering if your Blender tree automater could be set up to create something like, something beyond a generic tree? I wonder how hard it would be to create in blender?

I wish. My tree generator is good for making younger or smaller trees, but won't work for anything gnarly and old like the trees in your shot.

You could make one of your own in Blender using some variations on this, though...


One other question, the the Forest Road project, the guy I was following, he basically said to take any tree mesh and make it as big as you want. Could there be an issue with ending up with leave larger than they should be? Or would the leaves stay the same size? Or would it be the idea that probably no-one would notice?

There's a lot of room to play with here. You can scale a tree up a good deal larger than it's default, and still have it look natural. Most people won't pay attention to the fact that your tree leaves are x% larger than they should be relative to something else in your scene. Not unless you go way off the reservation, and scale a tree up to the point the leaves are as large as a car or something.
 
At it's most basic Mixer, well, mixes. It's allows you to combine multiple megascan assets, or any texture stack you happen to have on hand into something new, but it doesn't have any functionality to create textures from scratch.

If you wanna do that, you'll need to get into something like Substance Designer, which not only allows you to create something from scratch, but also process photogrammetry data. That's another rabbit hole for you to get lost down if you're so inclined.

Mixer can also be used to texture your models, a'la Substance Painter. It's not quite as feature rich in comparison, but it's still pretty good, and also not nearly as obtuse about it.


I wish. My tree generator is good for making younger or smaller trees, but won't work for anything gnarly and old like the trees in your shot.

You could make one of your own in Blender using some variations on this, though...


There's a lot of room to play with here. You can scale a tree up a good deal larger than it's default, and still have it look natural. Most people won't pay attention to the fact that your tree leaves are x% larger than they should be relative to something else in your scene. Not unless you go way off the reservation, and scale a tree up to the point the leaves are as large as a car or something.

That guy said big trees, bigger than they should be in the background was good.
 
At it's most basic Mixer, well, mixes. It's allows you to combine multiple megascan assets, or any texture stack you happen to have on hand into something new, but it doesn't have any functionality to create textures from scratch.

If you wanna do that, you'll need to get into something like Substance Designer, which not only allows you to create something from scratch, but also process photogrammetry data. That's another rabbit hole for you to get lost down if you're so inclined.

Mixer can also be used to texture your models, a'la Substance Painter. It's not quite as feature rich in comparison, but it's still pretty good, and also not nearly as obtuse about it.


I wish. My tree generator is good for making younger or smaller trees, but won't work for anything gnarly and old like the trees in your shot.

You could make one of your own in Blender using some variations on this, though...


There's a lot of room to play with here. You can scale a tree up a good deal larger than it's default, and still have it look natural. Most people won't pay attention to the fact that your tree leaves are x% larger than they should be relative to something else in your scene. Not unless you go way off the reservation, and scale a tree up to the point the leaves are as large as a car or something.

Yeah, modeling a big specimen tree may be in my future, with you help, :p

In the last few days I’ve discovered I don’t have to learn channel packing right now. That what Megascans now puts out as a matter of routine, is channel packed for me, and just some minor adjustment to the $15 landscape material I bought makes it compatible with their downloaded texture packs. The landscape materials as is holds 5 distinct textures, and they can be painted onto the landscape just like vertex painting.

The author put out a video on how to add a 6th, but warned it is possible with too many textures allowed, it could bog down a running project.

My next question for the UE Forum:
Does it matter how many textures are built into a material, or does it only matter how many textures are applied to the landscape in a scene? In other words if you wanted to make a master master material, but you are careful and only utilize say only 4 in a quadrant are you goid to go?

So now I am picking suitable textures, and testing them and one I used before on the FirestvRoad is bugging me. It’s a dirt texture with roots showing. In the Forest Road project it was a nice dark brown, but in this landscape material it is very light, I’m not sure what is causing this difference. However the landscape material has a built in tint color and I’ll probably use that to darken it up Although there are setting in the material regarding ambient occlusion and diffusion which I can play with and see what king of effect that has.

The alternative would be to get into Mi er and learn how to alter the texture color there.
 
Back
Top